

Move across the image to compare the original model view with the finished render.
Render example
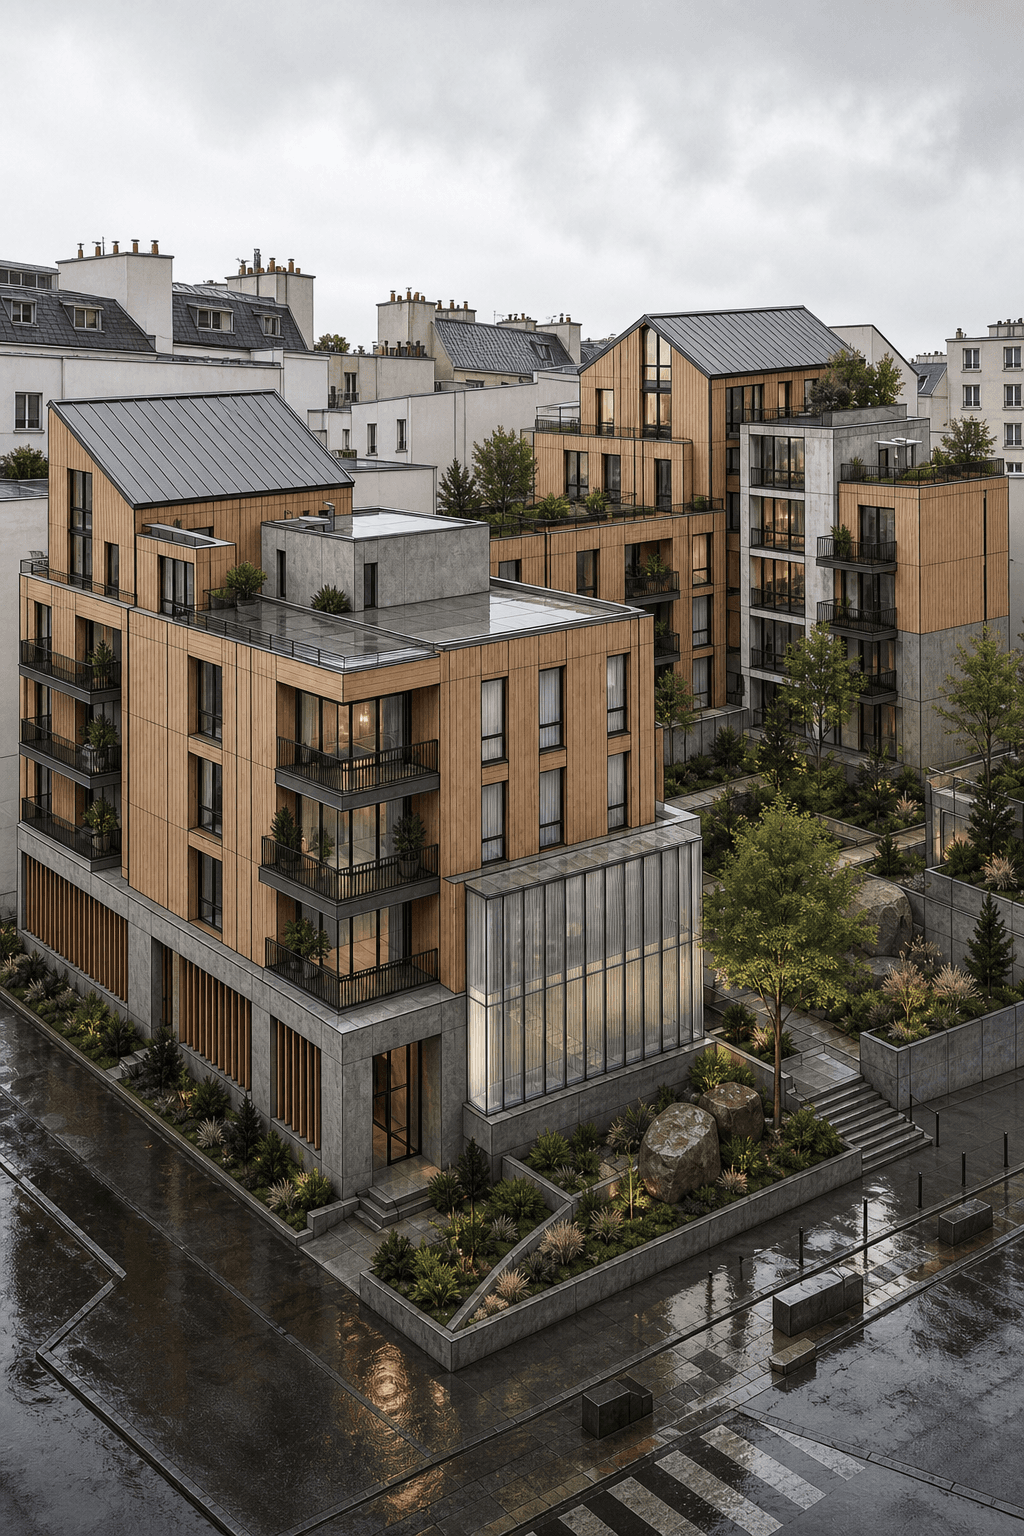
Mixed-use apartment block
Mixed-use apartment block with ground-floor retail, planted balconies, corner entrance canopy, and an active urban street edge. Made in Revit.
Free to use with a visible backlink to Rendervi. Link back to this page when you publish or repost the image.
See similar buildings
View gallery


FAQ
Render questions
A few practical notes for using Revit previews and project images inside Rendervi.
Can I turn a Revit model view into a photo-realistic render?
Yes. Export a clear view, screenshot, or clay preview from Revit, upload it to Rendervi, and use Photo-realism mode to push the image toward a finished architectural render while keeping the design readable.
How do I turn a preview into a photo-realism render?
Start with a clean preview that shows the camera angle, main geometry, and material direction. Upload it to the studio, choose Photo-realism, add a short note only if you need a specific mood or material change, then generate and compare the result with your source image.
Is my project image private?
Yes. Your uploads stay part of your Rendervi workspace and are handled as project data. Rendervi is built for professional architectural work where previews, client images, and design references need careful handling.
Do you train AI models with my renders?
No. Rendervi does not use your private project data to train Rendervi's own AI models. Uploaded content may be processed by third-party AI providers only to generate the result you requested.
Get access
Create your own photo-realistic architecture render
Upload a viewport, screenshot, or model export and move it toward a polished architectural render with controlled photo-realism.